

Arroyo was designed for a wide range of scales and use cases, from small single-node deployments to fully scaled-out clusters with hundreds of nodes.
For the latter case, the typical way to run it is within Kubernetes. Accordingly, Arroyo ships with support for both running the control plane on Kubernetes (via a Helm chart) and running the data plane on Kubernetes (via the Kubernetes scheduler) 1
Kubernetes has a reputation for being complicated (and it certainly can be!) but in recent years the major clouds have made it dramatically easier to create and operate Kubernetes clusters, with services like Google Kubernetes Engine (GKE) and Amazon’s Elastic Kubernetes Service (EKS).
This post is going to walk through the process of getting a production-level Arroyo cluster up and running on EKS.
Table of contents
- Creating the EKS Cluster
- Creating the Node Group
- Creating an S3 Bucket
- Setting up Kubectl
- Deploying Arroyo
Creating the EKS Cluster
The first step is to create an EKS cluster. If you already have a cluster, you can skip this step.
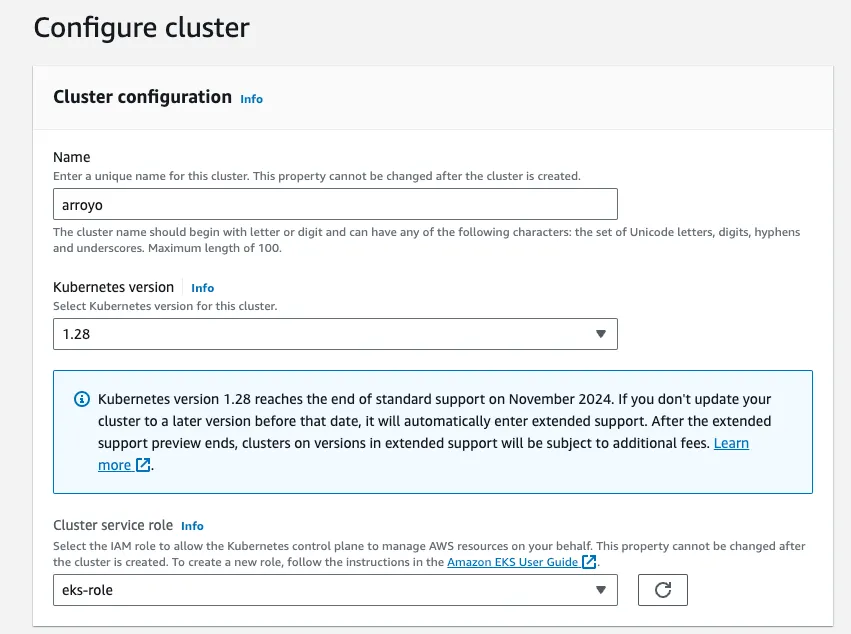
- Start by navigating to https://console.aws.amazon.com/eks/home?#/cluster-create, logging into your AWS account if necessary. On the first screen we configure the cluster name and version. Choose whatever you’d like for the name, and leave the rest of the configs as default.
- If this is the first time you’ve created an EKS cluster, you will need to create a Cluster Service Role, which allows EKS to create and manage resources on your behalf. Follow the guide here to do so.
- Next we configure networking. For the simplest setup, this can also be left as the defaults. However, a more secure option would be to use a private cluster endpoint and access the cluster over a VPN, but setting that up is out of scope for this guide.
- The rest of the settings (observability and add-ons) can all be set up with the default configurations.
- Continue through the wizard until you get to “Create.” Now our cluster is creating.
Creating the Node Group
Next, we will need to create a node group, which controls which EC2 instances will be created to provide compute resources for our cluster.
- Before we can create the node group, we need to create an IAM role for it. Navigate to https://console.aws.amazon.com/iam/home#/roles/create, select AWS service as the type of trusted entity, and select EC2 as the Service in the drop down. On the next sreen add the following policies:
- AmazonEBSCSIDriverPolicy
- AmazonEC2ContainerRegistryReadOnly
- AmazonEKS_CNI_Policy
- AmazonEKSWorkerNodePolicy
- AmazonS3FullAccess 2
- Finish creating the role, and give it a name like
EksNodePolicy. - Back in the EKS console, click on the cluster you created in the previous step, click into the Compute tab, and click “Add Node Group”.
- On the next screen, select
Amazon Linux 2 (AL2_x86_64)and configure the instance type you would like. We recommend c7i or c7g (Amazon’s Graviton ARM nodes which can offer substantial cost savings over x86). You can also increase the maximum number of nodes, which will support running larger clusters.

- The next two screens can be left as is, and on the final screen click “Create”.
- The last step is to add the EBS CSI Driver addon. This will allow us to create persistent storage needed for Postgres, which Arroyo uses as its metadata store. Click the “Add-ons” tab, then “Get more add-ons,” then select the
Amazon EBS CSI Driverand scroll down to click “Next”. Finish creating it with the default options.

Creating an S3 Bucket
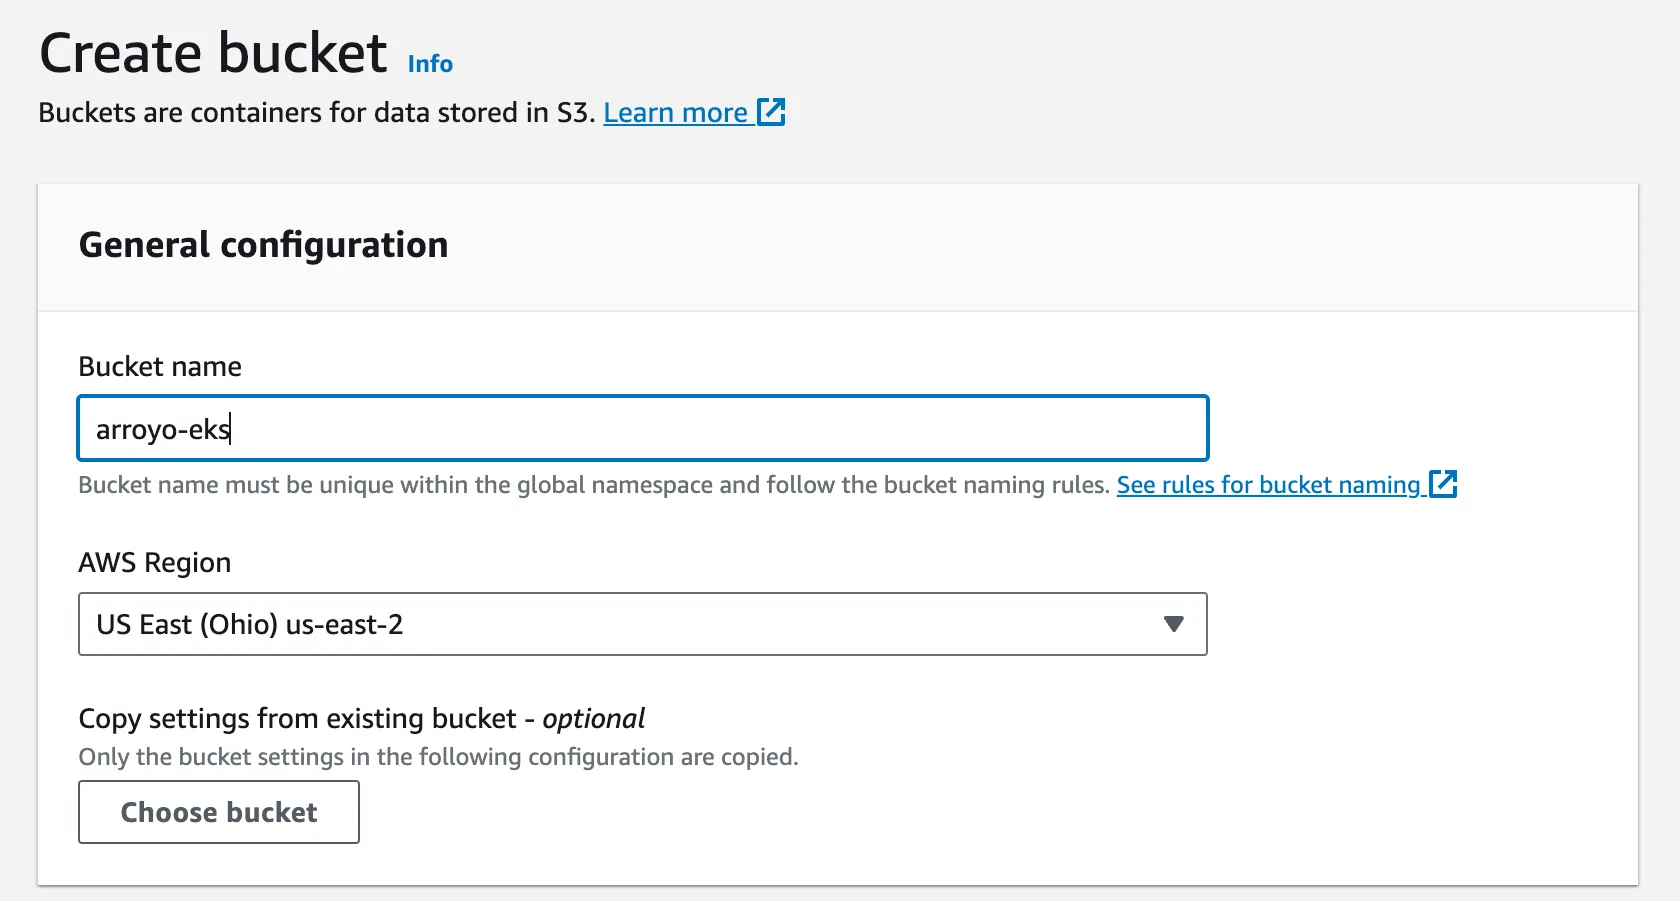
Now we have a cluster configured. While that’s spinning up, we’ll create an S3 bucket to store Arroyo checkpoints and outputs.
Navigate to the s3 bucket creation page, and create a new bucket with a unique name (I used arroyo-eks) then create it in your region with the default settings.
Setting up Kubectl
Now that we have the EKS cluster ready to go, we can deploy Arroyo to it. For this, we’ll need to set up kubectl and aws-cli be able to talk to our new Kubernetes cluster.
First, install kubectl if you don’t have it already:
$ brew install kubectl$ sudo apt install kubectl
$ sudo apt installNext we need to install aws-cli. On MacOS this is most easily done with Homebrew:
$ brew install awscliFor Linux and Windows, refer to Amazon’s instructions.
Next you will need to configure awscli to be able to authenticate to your AWS account. How this should be done will depend on the security settings for your account, and full details can be found in the AWS docs.
Now we should be able to configure kubectl to talk to and auth against our new EKS cluster:
$ aws eks update-kubeconfig --region us-east-2 --name arroyo(replace the region and name arguments according to the region you created the cluster in, and the name you gave it.)
To verify this is set up correctly, we can list the nodes in our cluster. It should show something like this:
$ kubectl get nodes
NAME                                        STATUS   ROLES    AGE   VERSION
ip-172-31-5-66.us-east-2.compute.internal   Ready    <none>   20h   v1.28.3-eks-4f4795d
Deploying Arroyo
To deploy Arroyo to our new EKS cluster we will use Helm, a Kubernetes package manager. This makes it easy to share configurations for Kubernetes applications like the Arroyo control plane via Helm charts.
Run these commands to install Helm and register the Arroyo repository:
$ brew install helm
$ helm repo add arroyo https://arroyosystems.github.io/helm-repo
$ helm search repo arroyo
NAME         	CHART VERSION	APP VERSION	DESCRIPTION
arroyo/arroyo	0.7.1        	0.7.1      	Helm chart for the Arroyo stream processing engine
Now that we have the Arroyo Helm repo registered, we need to create a configuration file for our Arroyo cluster. There are many properties that can be configured (see all of the options here: https://artifacthub.io/packages/helm/arroyo/arroyo).
For now we’re just going to configure a couple of paths, to tell Arroyo to use our new S3 bucket for artifacts and checkpoints.
Create a file called values.yaml with content that looks like this:
artifactUrl: "https://s3.us-east-2.amazonaws.com/arroyo-eks/artifacts"
checkpointUrl: "https://s3.us-east-2.amazonaws.com/arroyo-eks/checkpoints"
Replace the region with the correct region for your bucket, and the bucket name (arroyo-eks) with the name of the S3 bucket you created.
We’re finally ready to deploy Arroyo! We can do that with helm install, which will deploy our chart to Kubernetes with our configuration overrides:
$ helm install arroyo-cluster arroyo/arroyo -f /tmp/helm-values.yaml
NAME: arroyo-cluster
LAST DEPLOYED: Thu Nov  9 14:40:53 2023
NAMESPACE: default
STATUS: deployed
REVISION: 1
NOTES:
You've successfully installed arroyo!

This release is arroyo-cluster

Once the release is fully deployed, you can navigate to the web ui by running

  $ open "http://$(kubectl get service/arroyo-cluster-api -o jsonpath='{.spec.clusterIP}')"

(note this might take a few minutes if you are also deploying Postgres)

If that doesn't work (for example on MacOS or a remote Kubernetes cluster), you can also try

  $ kubectl port-forward service/arroyo-cluster-api 5115:80

And opening http://localhost:5115 in your browser.

See the documentation at https://doc.arroyo.dev, and ask questions on our discord: https://discord.gg/cjCr5rVmyR
The cluster can take a few minutes to fully roll out, primarily waiting for Postgres to be ready. You can monitor the progress by running
$ kubectl get pods -l app.kubernetes.io/instance=arroyo-clusterWhile Postgres is coming up, you may see the Arroyo pods restarting; that’s expected, as they won’t start until the database is available. Once all pods are in the Running state, you can launch the Web UI by running
$ kubectl port-forward service/arroyo-cluster-api 5115:80and opening http://localhost:5115 in your browser:
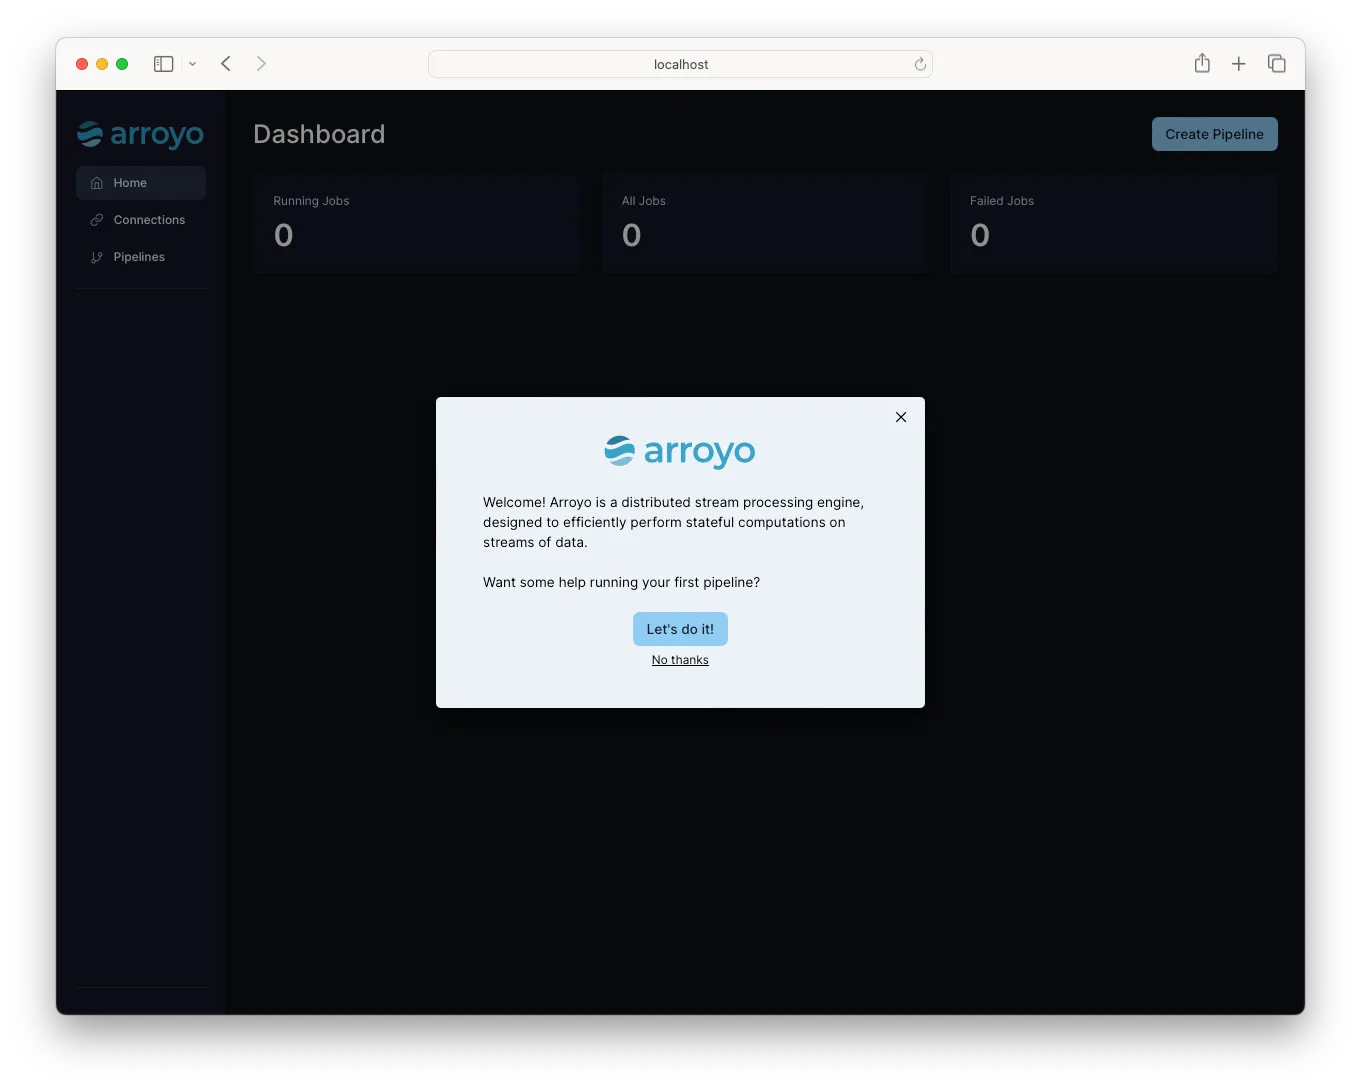
If you see arroyo-cluster-postgresl-0 stuck in Pending state, you may not have added the Amazon EBS CSI Driver to your cluster. Refer back to that step
And that’s it! You’re ready to start running streaming applications at scale.
Footnotes
Arroyo (like many distributed systems) is separated into two parts. The control plane is a persistent set of services including the api server, controller, and compiler. It’s responsible for serving the web ui and API, scheduling jobs, taking checkpoints, recovering from failures, and monitoring progress. The actual work of processing happens in the data plane which is made up of instances of arroyo-worker. Resources in the data plane will come and go as jobs are started, stopped, and scaled. ↩
The S3 policy can also be set up to only allow access to the specific bucket you created, but that’s out of scope for this guide. ↩